🚀 Able to supercharge your AI workflow? Strive ElevenLabs for AI voice and speech technology!
On this article, you’ll learn to bundle a educated machine studying mannequin behind a clear, well-validated HTTP API utilizing FastAPI, from coaching to native testing and fundamental manufacturing hardening.
Subjects we’ll cowl embody:
- Coaching, saving, and loading a scikit-learn pipeline for inference
- Constructing a FastAPI app with strict enter validation by way of Pydantic
- Exposing, testing, and hardening a prediction endpoint with well being checks
Let’s discover these strategies.

The Machine Studying Practitioner’s Information to Mannequin Deployment with FastAPI
Picture by Creator
When you’ve educated a machine studying mannequin, a standard query comes up: “How can we truly use it?” That is the place many machine studying practitioners get caught. Not as a result of deployment is tough, however as a result of it’s usually defined poorly. Deployment will not be about importing a .pkl file and hoping it really works. It merely means permitting one other system to ship information to your mannequin and get predictions again. The best manner to do that is by placing your mannequin behind an API. FastAPI makes this course of easy. It connects machine studying and backend improvement in a clear manner. It’s quick, supplies computerized API documentation with Swagger UI, validates enter information for you, and retains the code simple to learn and preserve. When you already use Python, FastAPI feels pure to work with.
On this article, you’ll learn to deploy a machine studying mannequin utilizing FastAPI step-by-step. Specifically, you’ll be taught:
- Tips on how to prepare, save, and cargo a machine studying mannequin
- Tips on how to construct a FastAPI app and outline legitimate inputs
- Tips on how to create and take a look at a prediction endpoint regionally
- Tips on how to add fundamental manufacturing options like well being checks and dependencies
Let’s get began!
Step 1: Coaching & Saving the Mannequin
Step one is to coach your machine studying mannequin. I’m coaching a mannequin to learn the way completely different home options affect the ultimate value. You need to use any mannequin. Create a file referred to as train_model.py:
|
1 2 3 4 5 6 7 8 9 10 11 12 13 14 15 16 17 18 19 20 21 22 23 24 |
import pandas as pd from sklearn.linear_model import LinearRegression from sklearn.pipeline import Pipeline from sklearn.preprocessing import StandardScaler import joblib
# Pattern coaching information information = pd.DataFrame({ “rooms”: [2, 3, 4, 5, 3, 4], “age”: [20, 15, 10, 5, 12, 7], “distance”: [10, 8, 5, 3, 6, 4], “value”: [100, 150, 200, 280, 180, 250] })
X = information[[“rooms”, “age”, “distance”]] y = information[“price”]
# Pipeline = preprocessing + mannequin pipeline = Pipeline([ (“scaler”, StandardScaler()), (“model”, LinearRegression()) ])
pipeline.match(X, y) |
After coaching, you must save the mannequin.
|
# Save the whole pipeline joblib.dump(pipeline, “house_price_model.joblib”) |
Now, run the next line within the terminal:
You now have a educated mannequin plus preprocessing pipeline, safely saved.
Step 2: Making a FastAPI App
That is simpler than you assume. Create a file referred to as essential.py:
|
from fastapi import FastAPI from pydantic import BaseModel import joblib
app = FastAPI(title=“Home Worth Prediction API”)
# Load mannequin as soon as at startup mannequin = joblib.load(“house_price_model.joblib”) |
Your mannequin is now:
- Loaded as soon as
- Stored in reminiscence
- Able to serve predictions
That is already higher than most newbie deployments.
Step 3: Defining What Enter Your Mannequin Expects
That is the place many deployments break. Your mannequin doesn’t settle for “JSON.” It accepts numbers in a selected construction. FastAPI makes use of Pydantic to implement this cleanly.
You is likely to be questioning what Pydantic is: Pydantic is an information validation library that FastAPI makes use of to verify the enter your API receives matches precisely what your mannequin expects. It mechanically checks information varieties, required fields, and codecs earlier than the request ever reaches your mannequin.
|
class HouseInput(BaseModel): rooms: int age: float distance: float |
This does two issues for you:
- Validates incoming information
- Paperwork your API mechanically
This ensures no extra “why is my mannequin crashing?” surprises.
Step 4: Creating the Prediction Endpoint
Now you must make your mannequin usable by making a prediction endpoint.
|
@app.submit(“/predict”) def predict_price(information: HouseInput): options = [[ data.rooms, data.age, data.distance ]]
prediction = mannequin.predict(options)
return { “predicted_price”: spherical(prediction[0], 2) } |
That’s your deployed mannequin. Now you can ship a POST request and get predictions again.
Step 5: Operating Your API Regionally
Run this command in your terminal:
|
uvicorn essential:app —reload |
Open your browser and go to:
|
http://127.0.0.1:8000/docs |
You’ll see:
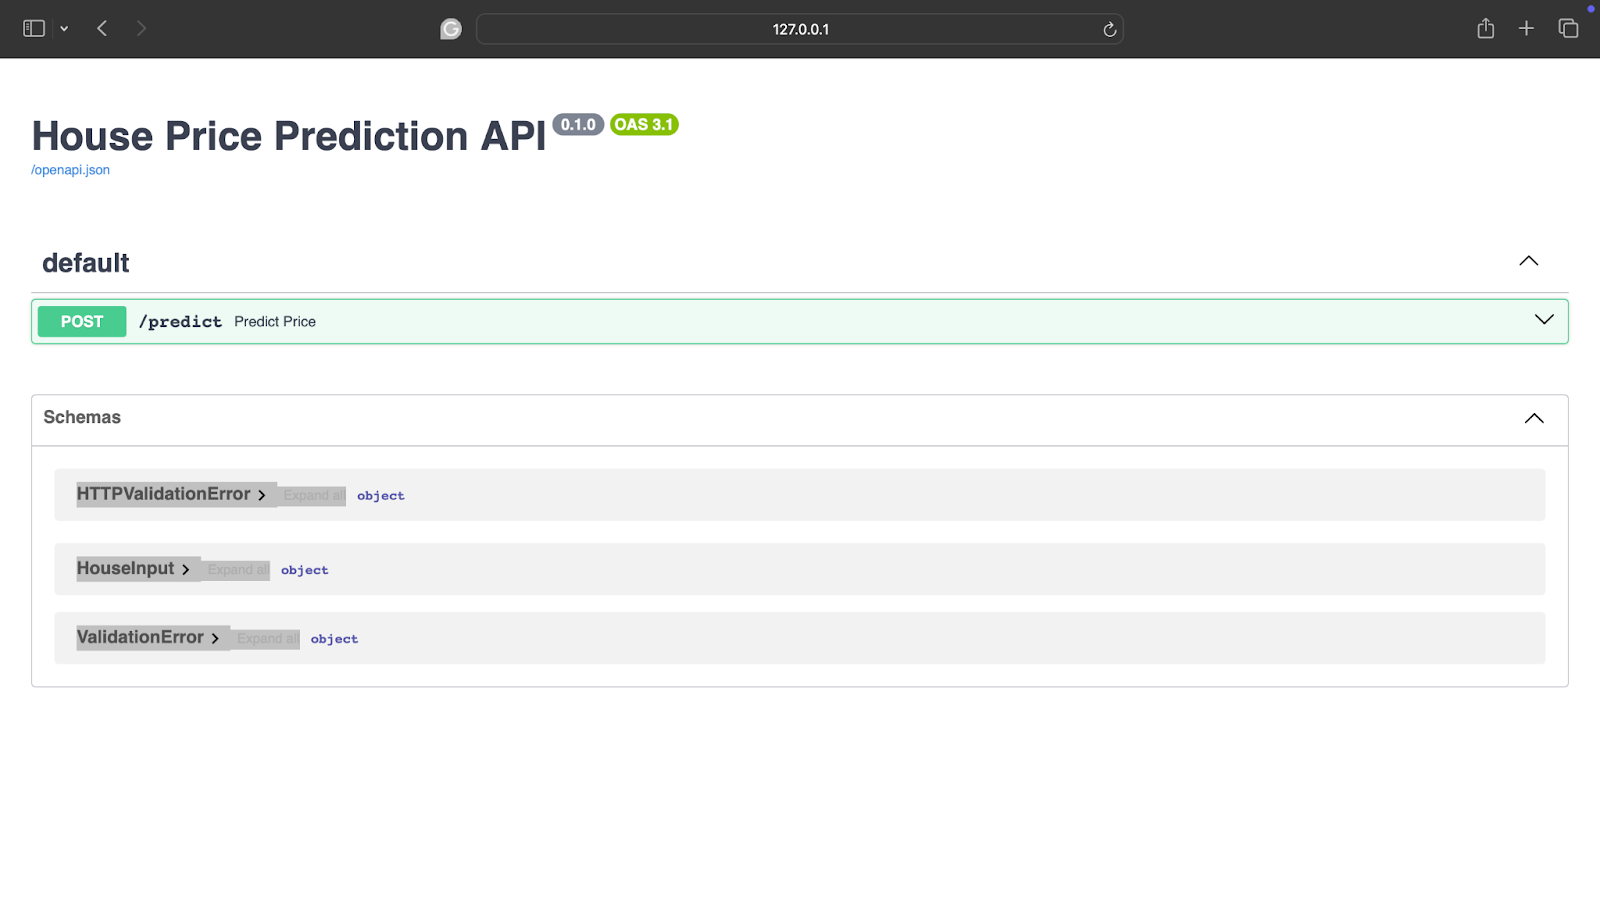
If you’re confused about what it means, you’re mainly seeing:
- Interactive API docs
- A kind to check your mannequin
- Actual-time validation
Step 6: Testing with Actual Enter
To try it out, click on on the next arrow:
![]()
After this, click on on Strive it out.
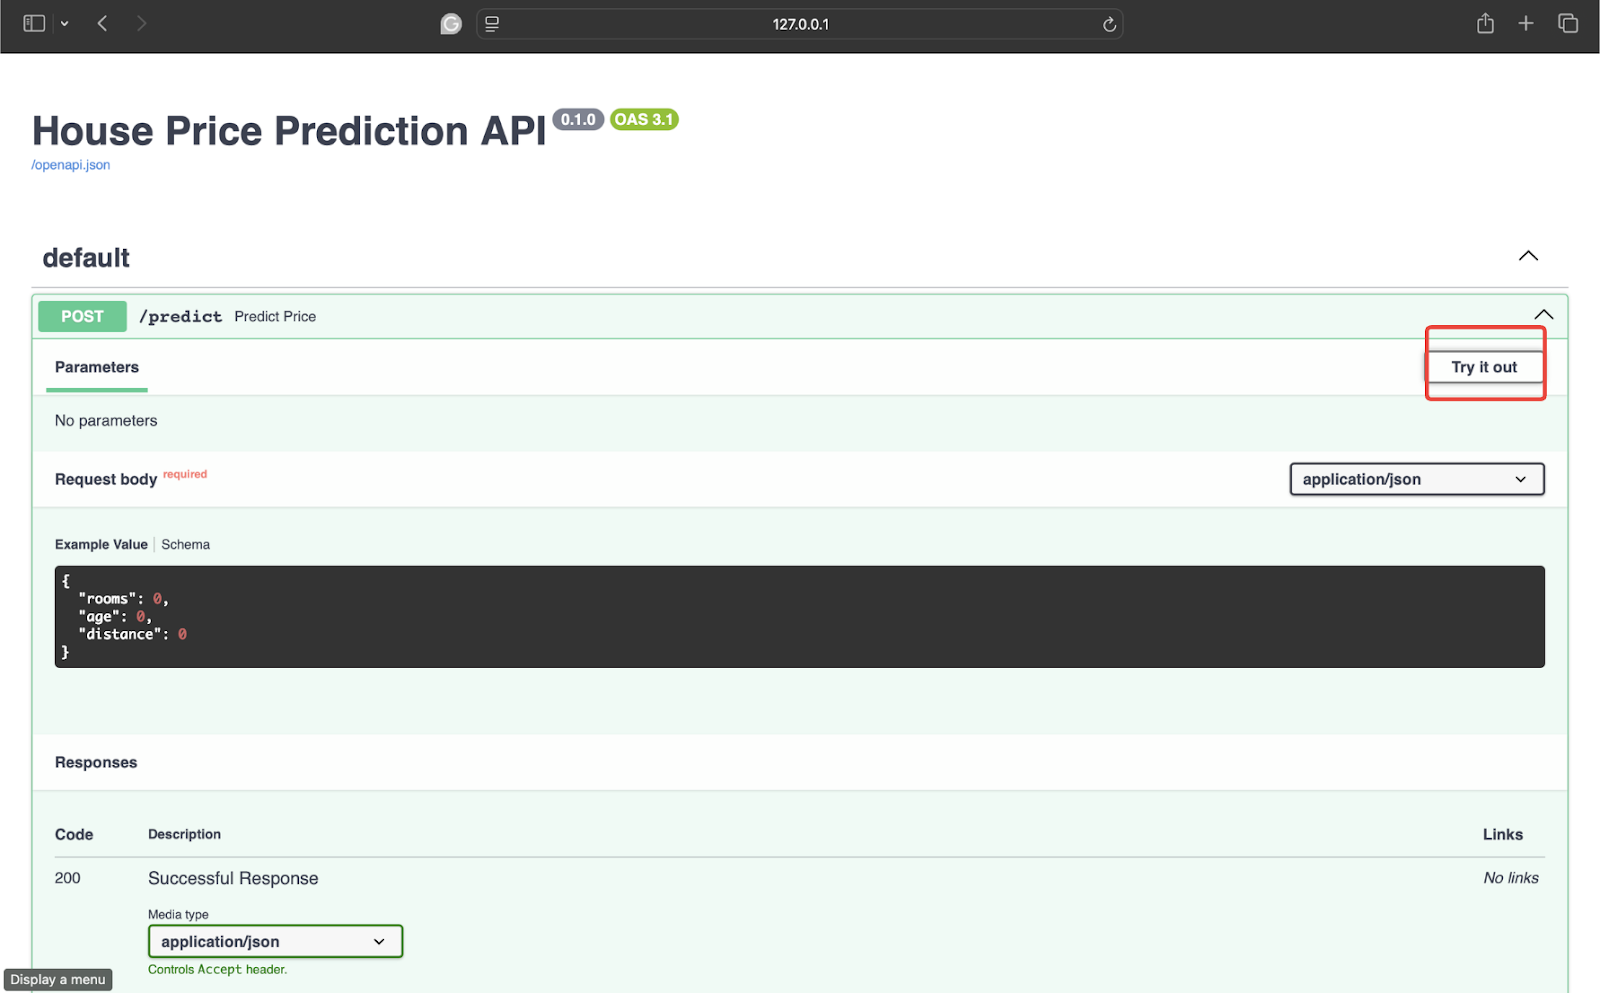
Now take a look at it with some information. I’m utilizing the next values:
|
{ “rooms”: 4, “age”: 8, “distance”: 5 } |
Now, click on on Execute to get the response.

The response is:
|
{ “predicted_price”: 246.67 } |
Your mannequin is now accepting actual information, returning predictions, and able to combine with apps, web sites, or different companies.
Step 7: Including a Well being Test
You don’t want Kubernetes on day one, however do take into account:
- Error dealing with (dangerous enter occurs)
- Logging predictions
- Versioning your fashions (/v1/predict)
- Well being verify endpoint
For instance:
|
@app.get(“/well being”) def well being(): return {“standing”: “okay”} |
Easy issues like this matter greater than fancy infrastructure.
Step 8: Including a Necessities.txt File
This step appears small, nevertheless it’s a type of issues that quietly saves you hours later. Your FastAPI app may run completely in your machine, however deployment environments don’t know what libraries you used except you inform them. That’s precisely what necessities.txt is for. It’s a easy record of dependencies your mission must run. Create a file referred to as necessities.txt and add:
|
fastapi uvicorn scikit–be taught pandas joblib |
Now, at any time when anybody has to arrange this mission, they simply should run the next line:
|
pip set up –r necessities.txt |
This ensures a clean run of the mission with no lacking packages. The general mission construction appears one thing like:
|
mission/ │ ├── train_model.py ├── essential.py ├── house_price_model.joblib ├── necessities.txt |
Conclusion
Your mannequin will not be useful till somebody can use it. FastAPI doesn’t flip you right into a backend engineer — it merely removes friction between your mannequin and the actual world. And when you deploy your first mannequin, you cease considering like “somebody who trains fashions” and begin considering like a practitioner who ships options. Please don’t overlook to verify the FastAPI documentation.
🔥 Need the very best instruments for AI advertising and marketing? Try GetResponse AI-powered automation to spice up your online business!